New Zealand and Australia Advanced Map Guide#
The New Zealand and Australia Advanced map in Risk: Global Domination presents an expansive and intricate battlefield, challenging players to navigate the diverse terrains of these regions for ultimate control.
At-a-Glance Stats#
| New Zealand and Australia Advanced Map | |
|---|---|
| Pack Name | Advanced II |
| Size | Large |
| Zones | 72 |
| Regions | 14 |
| Blizzards | 7 |
| Portals | 7 |
| Popularity | 7,900 |
| Official Description | "No Australia, no Win" just got a bit more complicated... |
New Zealand and Australia Advanced Map#
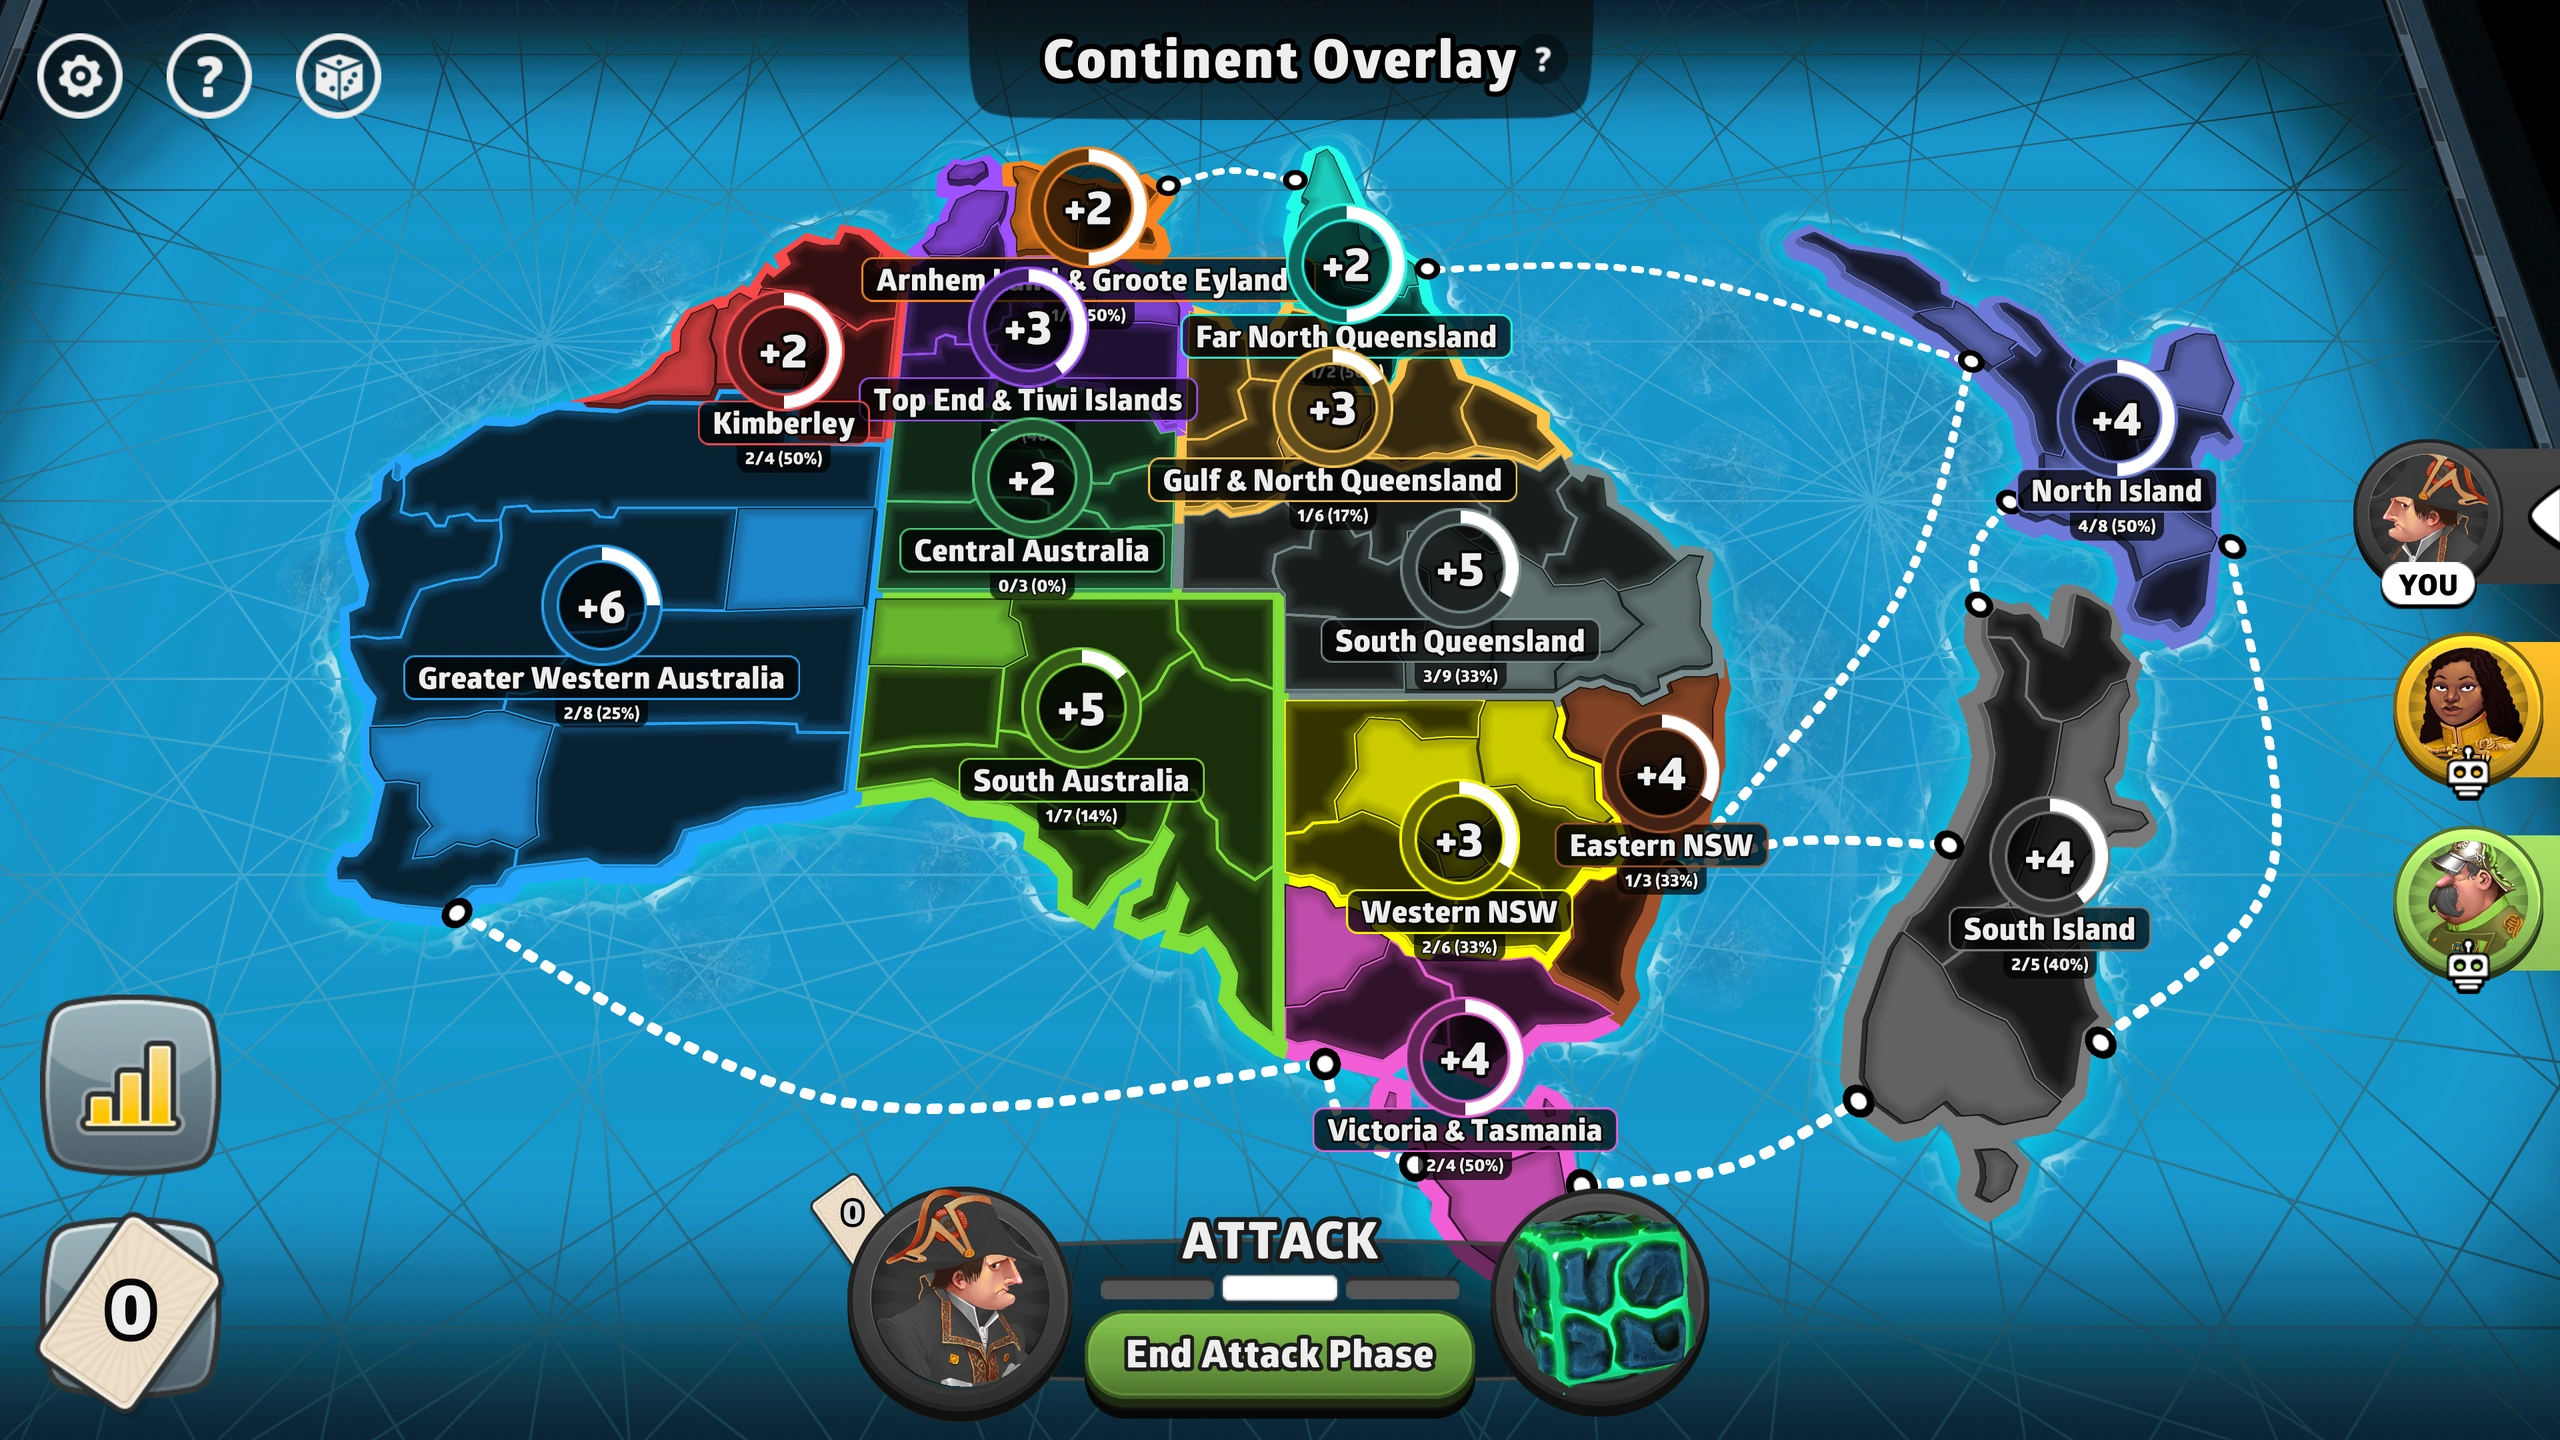
Regions & Bonuses#
The map divides New Zealand and Australia Advanced into 14 major regions (continents), each offering distinct strategic advantages:
| Region | Bonus |
|---|---|
| Arnhem Land & Groote Eylandt | 🟢 + 2 |
| Central Australia | 🟢 + 2 |
| Far North Queensland | 🟢 + 2 |
| Kimberley | 🟢 + 2 |
| Gulf & North Queensland | 🔵 + 3 |
| Top End & Tiwi Islands | 🔵 + 3 |
| Western NSW | 🔵 + 3 |
| Eastern NSW | 🟠 + 4 |
| North Island | 🟠 + 4 |
| South Island | 🟠 + 4 |
| Victoria & Tasmania | 🟠 + 4 |
| South Australia | 🔴 + 5 |
| South Queensland | 🔴 + 5 |
| Greater Western Australia | 🟣 + 6 |
Popularity#
This chart compares the popularity of the New Zealand and Australia Advanced Map (with 7,900 likes) against the average popularity across all maps (with 22,316 likes). New Zealand and Australia Advanced is 64.6% less popular than the average map.
YouTube & Tournament Showcase#
🎥 TheOfficialTourney 2025 – Round 2 Game 2 (70% Domination)#
This tournament match took place on New Zealand and Australia Advanced with high-pressure 70% Domination settings. True random dice, unstable portals, and progressive cards made every decision count.
Unlike tighter, bottleneck-heavy maps, this one is wide open. Bonuses are small, scattered, and hard to hold without overextending — especially with portals linking far corners of the map. I opted for a patient approach, securing smaller regions at the edge of the map, avoiding conflict, and waiting for the right opportunity.
Key takeaways from this game:
- 🧱 Open Layout: Many territories have multiple entry points, making defense difficult.
- 🗺️ Widespread Portals: Portal access enables surprise attacks across the board — and cuts off safer stacks.
- 🎲 True Random Risks: Attacks felt dicey (literally) — one failed hit could unravel a turn.
- 🐛 Bugged Territory: I considered a run, but was stopped halfway due to a bugged country.
- 🥉 Played for Points: I was eliminated during Black’s winning run, but secured 3rd place and 8 points.
This map rewards players who can keep multiple options open and know when to push versus when to survive. In a true random environment, stability is rare — adaptability is everything.